Custom Units (opt-in feature)
Custom Units addresses a long-standing problem that diaper banks, in particular, experience:
- On the one hand, when you are tracking raw inventory, writing grant proposals, or working with the NDBN, you need to know how many individual diapers you distribute.
- On the other hand, partners often want to work in terms of “packs” of diapers.
Unfortunately, there isn’t a standard number of diapers in a “pack”, even in the same size (sometimes not even with the same brand!), so we can’t just convert one to the other.
Custom Units is our solution so that the partners can order in terms of “packs”, “boxes”, “flats”, etc., but you as the Bank still work in terms of individual diapers.
You can specify different units (e.g. packs, boxes, flats) that the partners can use to order items, or the partner can still request them by the number of individual items (“units”).
You’ll see the number of “packs” that the Partner requested, but when creating the Distribution you’ll enter the number of individual Items you actually distribute.
(It’s not a perfect solution!)
We call this approach “Custom Unit” Requests.
Setting up Custom Units
For a Bank to allow Custom Units to be used for Partner Requests, they must first configure which units are allowed and which Items use custom units.
Set up your organization units
First, set up all of the units that you want to use.
- Click
My Organization - Click
Edit - In the “Custom Units” section, add in all of the Custom Units that you want to use
- Use lower-case singular names, e.g. “pack”, “box”, and “flat”
- You can make up your own unit names
- Other unit ideas: “large pack”, “small box”, “1-month box”
- Save changes

Set up units for specific Items
Next, you need to indicate which Items should have Custom Units.
- Go into the Inventory → Items & Inventory page, in the “Item List” section
- Select an Item, such as “Kids Pull-Ups (5T-6T)”, click
Edit

- Under “Additional Custom Request Units”, check each unit you would like Partners to be able to use when requesting this Item (1)
- In the example below, we picked “pack” and “flat”
- Optionally, enter a request limit beside each checked unit (2). This is the most of that unit a Partner can ask for in a single Request. (See Request limits, below.)

Allowed units are then shown in the “Custom Request Units” column of the Item list.

Request limits
Each unit on an Item can have its own request limit, and there is a separate “Request limit (individual items)” field for when the Partner requests in individual items. A limit is the most a Partner can ask for in one Request. Leave a limit blank if you don’t want one.
If a Partner submits a Request that exceeds a limit, the Request is rejected and the Partner sees a message naming the Item, what they asked for, and the limit – for instance, “Kids Pull-Ups (5T-6T): You requested 10 packs, but are limited to 4 packs.” They can then change the quantity and resubmit.
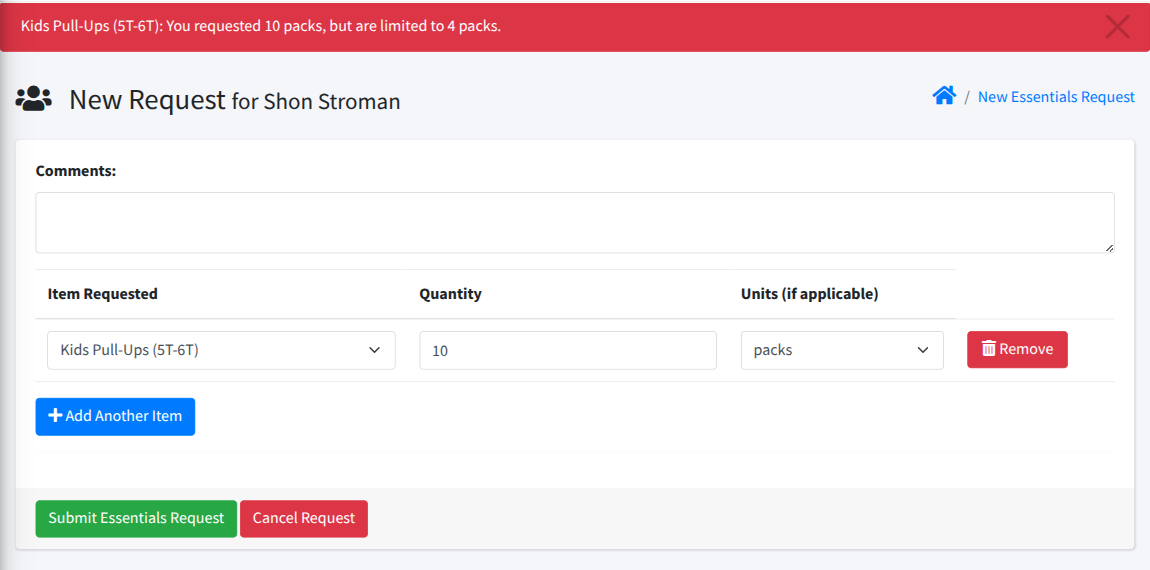
[!NOTE] Limits are checked against the unit the Partner chose. If a Partner asks for 10 packs, we compare that to the “pack” limit, not to the individual-item limit – we don’t know how many items are in a pack!
How Partners use Custom Units in Requests
When a Partner places a Request, they fill out a form indicating the Items they are requesting. If the Item is configured to have Custom Units, they must now select the units for that Item.

The units field is only provided for Items that have Custom Units configured. The Partner must make a selection in this field, but can choose “Units” to indicate that they want that number of individual Items no matter how they’re packaged.

The confirmation screen shows the requested units.

Once the Partner confirms the Request, Human Essentials will show them a success page that includes the requested units.

The email sent to the Partner will also indicate the requested units.

The Request History page shows the units alongside the Item quantities.

Processing Requests with Custom Units
The request detail includes any Custom Units chosen for each Item.

From the Request list, clicking Print Unfulfilled Picklists button generates a Picklist. The Request Picklist PDF lists units when they are specified on an requested Item.

When you create a Distribution from a Request, you must enter the distributed quantity of the requested Items. The quantity will be defaulted to the requested amount only for those Items where either there are no Custom Units available or the Partner chose “Unit”, but you will see the requested number and units (if applicable) for each Item as well.
[!NOTE] The “Quantity - Total Units” is individual units!
So if the Partner requested “9 boxes” of Pads, and each box has 10 Pads, then you would put “90” in the “Quantity - Total Units” field (assuming you are providing the full 9 boxes).
In the example below, the Partner asked for 29 packs of Pads (2), so the “Quantity - Total Units” field (1) is left for you to fill in with the number of individual Pads you are sending.

Distributions are always created in terms of raw quantity, not requested units.
Other reporting
From the list of Requests, you can click on Calculate Product Totals to get a summary of the request quantities. These are separated out by the different units requested.

Similarly you can export Requests as a CSV. This will include a column for each allowed Item/unit combination.